
Why Does My Wig Cap Show? The Hidden Reasons Your Wig Doesn’t Look Natural

The Wig Is Not Always the Problem — Sometimes the Hidden Layer Is
Have you ever looked in the mirror after installing your wig and thought:
“Why does my hair look beautiful from far away, but something feels off when I get closer?”
This is one of the most frustrating moments for many wig wearers.
The hair texture looks good.
The curls move nicely.
The color matches your style.
But then you notice it.
A small shadow near the part.
A line around the edge.
A slightly visible cap underneath.
And suddenly, instead of feeling confident, you start thinking about your wig.
That is the strange thing about natural-looking wigs:
The details people notice are often the details we do not expect.
A wig does not usually look unnatural because the hair itself is bad.
Sometimes the issue is hidden underneath.
The wig cap.
A lot of women assume:
“If my wig cap is showing, I bought the wrong wig.”
But after years of helping wig wearers solve installation problems, I have found something interesting.
Many cap visibility problems are not caused by the wig.
They come from small choices:
- choosing the wrong cap color;
- wearing the wrong size;
- incorrect lace placement;
- too much tension underneath;
- insufficient hair density;
- incorrect styling direction.
The good news?
Most of these problems can be adjusted.
Why Does a Wig Cap Show? Understanding the Real Reason Behind the Problem
A wig cap becomes visible when the layers underneath the hair do not disappear visually.
Think about makeup.
A foundation shade that is slightly wrong can make the entire face look different.
The same idea applies to wigs.
The cap, lace, hair density, and natural hair underneath all create one visual picture.
If one layer does not match, the illusion becomes weaker.
The Four Main Dimensions That Make a Wig Cap Visible
Dimension One: The Wig Cap Color Does Not Match Your Skin Tone
This is one of the most common reasons.
Many beginners focus heavily on hair color.
They ask:
“Does this blonde match me?”
“Does this curl pattern look natural?”
But they forget the base.
The wig cap is the foundation.
If the foundation is visible, the entire hairstyle can look less realistic.
Why Cap Color Matters
Imagine wearing a transparent shirt over a bright colored top.
Even if the shirt is beautiful, the color underneath changes the overall appearance.
A wig cap works similarly.
Common cap colors include:
- black;
- brown;
- beige;
- transparent lace tones.
A darker cap may create a shadow effect.
A lighter cap may stand out against deeper skin tones.
The goal is not finding a “perfect universal color.”
The goal is creating visual harmony.
How to Fix a Visible Wig Cap Color Issue
A practical adjustment sequence:
Step 1:
Check your wig under natural daylight.
Indoor lighting can hide problems.
Sunlight often reveals:
- cap shadows;
- lace contrast;
- unnatural lines.
Step 2:
Compare the cap area with your scalp color.
Step 3:
Adjust with:
- lace tinting products;
- foundation matching;
- wig cap alternatives.
Small color corrections can change the entire appearance.


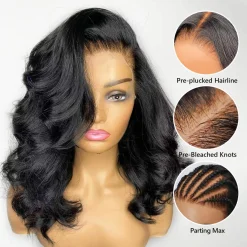
HD lace wigs
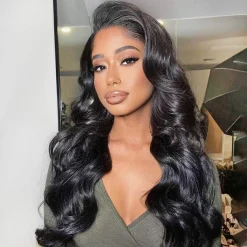
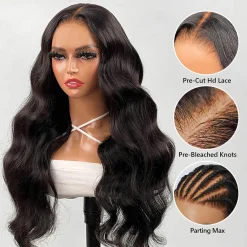
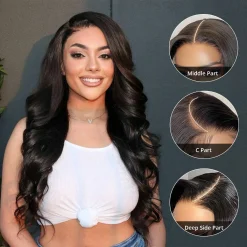
Pre-bleached Knots Straight HD Lace Frontal Wig 180% Density 6×5 Pre-cut Lace Wear & Go Glueless Wig
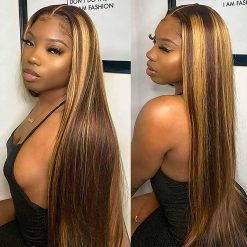
HD lace wigs


HD lace wigs
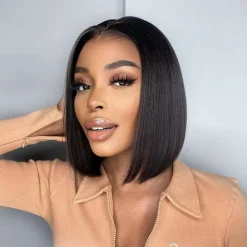
Glueless Straight Short Bob Wigs Brazilian Clear Lace 180% Density Hd Closure Wig Human Hair

HD lace wigs

Dimension Two: Your Natural Hair Underneath Is Creating Extra Height
Another hidden reason:
The wig cap is not the only layer.
Your natural hair underneath affects the final shape.
This is especially common for women with:
- thick natural hair;
- long braids;
- bulky cornrows;
- uneven braiding patterns.
A wig sits on whatever foundation you create underneath.
If the base is uneven, the wig rises.
When the wig rises:
- the hairline may move upward;
- the cap edge may become visible;
- the crown may look too large.
This is why some women say:
“My wig looks too big even though the size is correct.”
The issue is not always the wig size.
Sometimes it is the foundation.
Creating a Flat Wig Foundation: Professional Sequence
A cleaner base usually follows this order:
Step 1:
Detangle natural hair carefully.
Step 2:
Create flat braids.
Avoid large bumps.
Step 3:
Place the braids evenly.
The goal is distributing volume, not compressing aggressively.
Step 4:
Secure loose ends.
Loose hair underneath can create unexpected bumps.
Real Case Study One: Angela’s “Too Big” Lace Front Wig
Angela purchased her first human hair lace front wig.
She loved everything about it:
The length.
The texture.
The movement.
But after installation, she felt disappointed.
She told me:
“It looks like I am wearing a wig instead of the wig becoming my hair.”
When we checked the installation, the problem became clear.
Her natural hair underneath was long and thick.
She had created two large braids at the back of her head.
This pushed the wig upward.
The result:
- visible cap edge;
- higher crown;
- unnatural hairline position.
The solution was simple:
She changed her braid pattern.
Instead of two thick braids, she created several flatter sections.
The wig immediately sat closer to her head.
The lesson:
Sometimes the wig does not need changing.
The foundation does.

Dimension Three: The Lace Front and Hairline Are Not Blending Correctly
A wig cap may appear visible because the front hairline transition is not seamless.
This is where lace quality becomes important.
A lace front wig works because the lace creates an illusion:
The hair appears to grow from the scalp.
But several elements must work together:
- lace color;
- lace thickness;
- hairline placement;
- adhesive method;
- customization.
HD Lace vs Regular Lace: Why the Difference Matters
HD lace is designed to be thinner and more delicate.
When installed correctly, it can blend more naturally.
However, thinner lace does not automatically solve every problem.
A poorly positioned lace front can still look visible.
The lace must follow your actual hairline.
MsAloe’s HD lace wig options are designed for wearers comparing different lace constructions and natural hairline styles. The choice between lace types depends on your preferred installation method and daily routine.
https://www.msaloe.com/category/wigs/hd-lace-wigs
Dimension Three: The Lace Front and Hairline Are Not Blending Correctly(continued)
Many women think the lace itself is the magic part.
But lace is only one piece of the puzzle.
A natural hairline is created by the relationship between:
- the lace material;
- the placement of the lace;
- the density of hair knots;
- the direction of the baby hairs;
- the adhesive technique.
A beautiful lace front wig can still look obvious if these elements are not working together.
The Hairline Placement Mistake Many Beginners Make
One of the most common mistakes is placing the lace too far forward.
When the lace sits lower than your natural hairline, several things happen:
- your forehead appears smaller;
- the hairline looks too straight;
- the lace edge becomes easier to notice;
- the wig cap underneath may create a visible shadow.
A natural hairline usually has small irregularities.
Real hair does not grow in a perfectly symmetrical line.
There are tiny variations:
- softer temples;
- uneven baby hairs;
- small changes in density.
When a wig is installed too perfectly straight, it can actually look less realistic.
The Hairline Customization Process
A professional-looking lace front wig usually requires some personalization.
Here is a common customization sequence:
Step 1: Try the wig before cutting the lace
Do not immediately cut away all excess lace.
Place the wig on your head first.
Check:
- where your natural hairline begins;
- where your temples sit;
- whether the parting looks natural.
Step 2: Adjust the lace shape
Many factory-made wigs have a general hairline shape.
But every person’s forehead is different.
Some women have:
- higher foreheads;
- rounded hairlines;
- widow’s peaks;
- softer temple areas.
The lace may need slight trimming.
Step 3: Create natural baby hairs
Baby hairs are not supposed to cover mistakes.
They are meant to soften transitions.
Too many baby hairs can make a wig look styled rather than natural.
The goal is:
“I wonder if that is her real hair.”
Not:
“She is wearing baby hairs.”
Dimension Four: Hair Density Is Making the Wig Cap Visible
This is a detail many people overlook.
A wig can have beautiful lace and still show the cap if the hair density is not suitable.
Hair density refers to how much hair is ventilated onto the lace.
Common density options include:
- light density;
- medium density;
- high density.
Why Density Changes the Way a Wig Looks
Imagine a thin curtain.
You can see the structure behind it.
Now imagine a thicker curtain.
The background disappears.
Hair density works similarly.
If the wig density is too low:
- the cap underneath may show;
- the knots may appear more visible;
- the scalp illusion becomes weaker.
If the density is too high:
- the wig may look heavy;
- the hairline may appear unnatural;
- the hairstyle loses movement.
The goal is balance.
Choosing Density Based on Hairstyle
Different hairstyles require different density choices.
Straight hairstyles
Straight hair often exposes more surface area.
Medium density usually creates a realistic appearance.
Very high density straight wigs can sometimes look bulky.
Curly hairstyles
Curly textures naturally create more volume.
A medium or slightly higher density can look balanced.
Bob wigs
Bob wigs are especially sensitive.
Because the haircut is shorter, the shape is visible.
Too much density can create:
- a helmet effect;
- wide sides;
- unnatural volume around the cheeks.
A properly designed bob should have movement.
Not a solid block of hair.
HD lace wigs
Pre-bleached Knots Straight HD Lace Frontal Wig 180% Density 6×5 Pre-cut Lace Wear & Go Glueless Wig
HD lace wigs
HD lace wigs
Glueless Straight Short Bob Wigs Brazilian Clear Lace 180% Density Hd Closure Wig Human Hair
HD lace wigs
Real Case Study Two: Michelle’s Lace Look That Worked Indoors But Failed Outside
Michelle had worn wigs for several years.
She was comfortable installing wigs herself.
At home, under bathroom lighting, everything looked perfect.
The hairline looked melted.
The lace seemed invisible.
But when she went outside with friends, she noticed something different.
In photos taken outdoors, she could clearly see:
- a darker line near the forehead;
- slight separation between lace and skin;
- the cap shadow around the part.
She thought the wig quality was the problem.
But after examining the wig, the issue was actually installation.
The problem:
She applied adhesive only in the center area.
The temple sections had less contact.
Under indoor lighting, this was difficult to notice.
But sunlight revealed the difference.
The solution:
She changed her installation sequence:
- Cleaned the forehead area with an oil-free cleanser.
- Applied adhesive evenly along the full lace perimeter.
- Allowed each adhesive layer to become tacky before adding another layer.
- Pressed the lace gently using a melt band.
- Checked the hairline under natural daylight.
The result was not about using more product.
It was about using the right process.
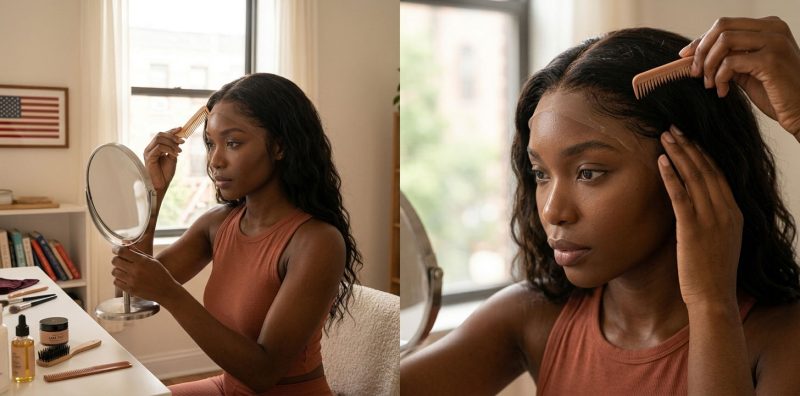
Adhesion Problems: When the Wig Is Installed Correctly but Still Looks Visible
Adhesive is another area where many beginners become frustrated.
They think:
“More glue means a more invisible wig.”
But that is not always true.
Adhesion is about balance.
Too little:
- lace lifts;
- edges become visible;
- movement reveals the boundary.
Too much:
- residue builds up;
- lace becomes cloudy;
- cleanup becomes difficult.
Understanding Different Adhesion Methods
Common methods include:
Wig glue
Liquid adhesives can provide strong hold.
They work best when:
- skin is clean;
- oil is removed;
- application is thin and controlled.
Wig tape
Tape can be convenient.
Many people prefer it for:
- shorter wear periods;
- easier removal.
Glueless installation
Glueless wigs use:
- adjustable straps;
- combs;
- elastic bands.
They can be a good choice for people who change styles often.
The trade-off is usually less security compared with adhesive methods.
The Cleaning Step Many People Skip
A common reason lace looks visible after a few wears:
product buildup.
Over time, the hairline area collects:
- adhesive residue;
- oil;
- skincare products;
- sweat.
This creates a slightly cloudy appearance.
A simple maintenance routine:
After wearing:
Remove adhesive gently.
Avoid pulling the lace.
Before reinstalling:
Clean:
- forehead area;
- lace edge;
- inside cap.
Before styling:
Make sure the lace is completely dry.
Moisture trapped under lace can affect blending.
How Lighting Reveals Wig Cap Problems
Many wig issues appear suddenly because of lighting.
A hairstyle that looks perfect in a bedroom mirror may look different in:
- sunlight;
- restaurant lighting;
- camera flash;
- office lighting.
Different light sources reveal different details.
Sunlight
Sunlight is usually the most honest test.
It reveals:
- lace contrast;
- cap shadows;
- uneven density;
- unnatural shine.
This is why many women say:
“My wig looked fine until I went outside.”
Camera Flash
Flash photography can emphasize:
- synthetic fiber shine;
- lace edges;
- texture differences.
For synthetic wigs especially, choosing the right fiber quality matters.
Some synthetic fibers reflect more light than human hair.
How Synthetic Wig and Human Hair Wig Differences Affect Cap Visibility
The material of the wig changes the final appearance.
Synthetic Wigs
Synthetic wigs have advantages:
- affordable;
- pre-styled;
- easy maintenance.
But some synthetic fibers can:
- reflect more light;
- hold a fixed shape;
- appear less flexible.
Choosing a realistic fiber texture helps reduce the artificial look.
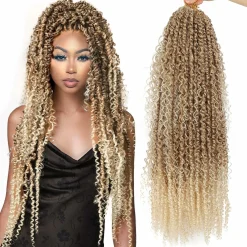
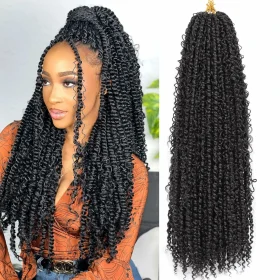
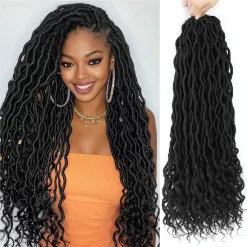

Synthetic Extensions


Synthetic Extensions
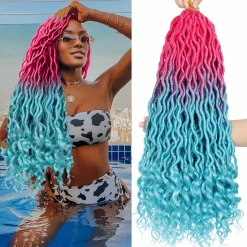
Synthetic Extensions
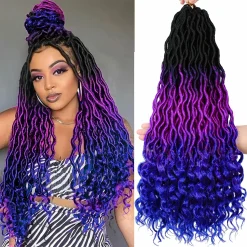
Synthetic Extensions
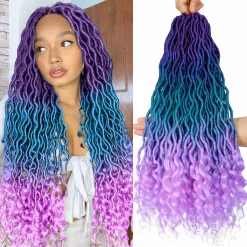
Human Hair Wigs
Human hair wigs usually offer:
- natural movement;
- heat styling flexibility;
- realistic shine.
However, they still require proper installation.
A high-quality human hair wig can still look unnatural if:
- the lace placement is incorrect;
- the cap size is wrong;
- the hairline is not customized.
The material helps.
The technique completes the look.
The Complete Wig Cap Fixing Sequence: A Step-by-Step Method to Make Your Wig Look More Natural
After helping many wig wearers troubleshoot visible wig caps, I noticed something interesting.
Most problems are not caused by one big mistake.
They usually come from several small details happening together.
A slightly wrong cap color.
A little too much volume underneath.
A lace edge that is not fully blended.
A hairstyle that does not match the density.
Each detail may seem small.
But together, they change the final appearance.
The good news is that you can approach the problem like a professional.
Instead of randomly adjusting things, follow a sequence.
Step 1: Check the Wig Before Installing It
Many people immediately put on a wig and start cutting, gluing, and styling.
A better approach is observation.
Before installation, check:
Hairline shape
Does the hairline look natural?
Look for:
- irregular patterns;
- realistic temple design;
- gradual density changes.
A perfectly straight hairline often looks less natural.
Lace color
Hold the lace against your skin.
Check:
- does it disappear?
- does it create a gray shadow?
- does it look too light?
Remember:
The best lace color is not the one that looks good alone.
It is the one that disappears when worn.
Cap construction
Look inside the wig.
Check:
- adjustable straps;
- comb placement;
- cap size;
- ventilation area.
A cap that is too large often creates extra space.
That extra space can make the wig sit higher.
Step 2: Prepare Your Natural Hair Correctly
A natural-looking wig starts underneath.
Think of your natural hair as the foundation of a house.
If the foundation is uneven, decorating the outside will not completely solve the problem.
For most lace front wig installations:
Long hair:
Use multiple flat braids instead of one or two thick sections.
Short natural hair:
Distribute volume evenly.
Thick curly hair:
Avoid forcing all hair into one compressed area.
This can create bumps and pressure points.
Step 3: Position the Wig According to Your Natural Hairline
A common beginner mistake:
Following the wig’s factory hairline instead of your own face shape.
Every forehead is different.
Some people have:
- a shorter forehead;
- a higher forehead;
- a rounded hairline;
- deeper temple areas.
The wig should work with your features.
Not against them.
Step 4: Blend the Lace Carefully
A good lace melt is not about hiding the lace with excessive products.
It is about creating a smooth transition.
A basic sequence:
First:
Clean your skin.
Remove:
- moisturizer;
- sunscreen;
- oil.
These can prevent proper adhesion.
Second:
Apply adhesive carefully.
Avoid thick layers.
A thick adhesive layer can create texture underneath the lace.
Third:
Allow the adhesive to become slightly tacky.
This step matters.
If the glue is still wet, the lace can slide.
If it is too dry, the lace may not attach evenly.
Fourth:
Press the lace gently.
Do not aggressively rub.
The lace is delicate.
Too much pressure can distort the hairline.
HD lace wigs
Pre-bleached Knots Straight HD Lace Frontal Wig 180% Density 6×5 Pre-cut Lace Wear & Go Glueless Wig
HD lace wigs
HD lace wigs
Glueless Straight Short Bob Wigs Brazilian Clear Lace 180% Density Hd Closure Wig Human Hair
HD lace wigs
Step 5: Style the Hair Around the Hairline
The front area controls the entire illusion.
Small details matter.
Avoid Too Much Baby Hair
Baby hairs should soften the transition.
They should not become the main focus.
Too many styled baby hairs can create a “wig style” appearance.
Natural hairlines usually have:
- random direction;
- different lengths;
- softer density.
Adjust the Parting Area
The part is another place where caps can show.
If the part looks too wide:
The viewer may notice the structure underneath.
You can improve this by:
- adding light styling powder;
- adjusting hair direction;
- gently separating strands.
A Friendly Mirror Test: The Three Distance Rule
One trick I often share with wig beginners is the three-distance test.
Do not judge your wig only from one mirror position.
Check three distances.
Distance One: Close-Up Mirror Check
Stand about one foot away.
Look at:
- lace edge;
- hairline;
- parting.
This reveals technical issues.
Distance Two: Conversation Distance
Stand about three feet away.
This is how people usually see you.
Ask:
Does the hairstyle feel natural?
Does anything immediately attract attention?
Distance Three: Camera Distance
Take a photo.
Sometimes cameras reveal things mirrors hide.
Check:
- shine;
- density;
- hairline.
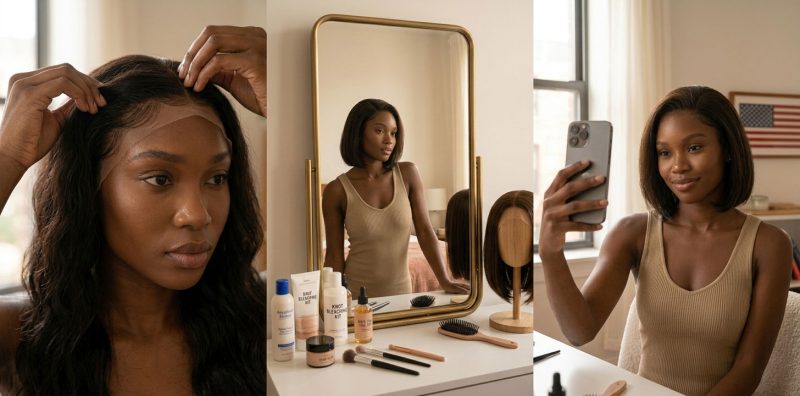
The Friend Test: What Would Your Best Friend Notice?
Sometimes we become too focused on tiny details.
A little lace edge.
A small adjustment.
A slight difference in texture.
We stand in front of the mirror searching for problems.
But your friends usually see the whole picture.
They notice:
- your confidence;
- your hairstyle;
- your expression.
Not every tiny detail.
A wig should support your life.
It should not become something you constantly worry about.
FAQ: Why Does My Wig Cap Show?
Why can I see my wig cap through the hair?
Usually because one of these areas needs adjustment:
- hair density;
- cap color;
- lighting;
- styling;
- installation.
A low-density wig may show more structure underneath.
A darker cap may create visible contrast.
Does a lace front wig always hide the wig cap?
A lace front wig helps create a natural-looking hairline, but it does not automatically hide every issue.
The final result depends on:
- correct placement;
- customization;
- maintenance;
- styling.
Why does my wig look natural indoors but fake outside?
Different lighting reveals different details.
Outdoor sunlight is stronger and shows:
- lace contrast;
- shine;
- uneven blending.
Always check your wig under natural light before important events.
Can makeup hide a visible wig cap?
Sometimes light customization can help.
However, makeup should not replace correct installation.
If the cap is the wrong color or the wig is sitting incorrectly, makeup only covers part of the problem.
Is a human hair wig always more natural than synthetic?
Human hair offers realistic movement and styling flexibility.
But installation still matters.
A poorly fitted human hair wig can look less natural than a properly installed synthetic wig.
Synthetic Extensions
Synthetic Extensions
Synthetic Extensions
Synthetic Extensions
How often should I adjust my wig installation?
It depends on:
- wear frequency;
- adhesive method;
- lifestyle;
- scalp condition.
Someone wearing a wig daily may need more frequent maintenance than someone wearing one occasionally.
The Gentle Reminder I Tell Every Wig Wearer
A wig is not supposed to make you feel like you are hiding.
The best wig experiences usually happen when the technical details become invisible.
You stop thinking:
“Can people tell?”
And start thinking:
“I love how I look today.”
That small emotional shift is often the real goal.
For women exploring different wig constructions, MsAloe also provides educational resources about choosing wig styles, lace options, and maintenance routines:
Learning the small details behind installation often makes a bigger difference than simply buying a different wig.
Final Thoughts: A Natural Wig Is Built From Small Details
When a wig cap shows, it can feel frustrating.
You may think:
“I chose the wrong wig.”
But often the answer is much simpler.
A natural wig appearance comes from many small choices working together:
- the right cap color;
- the correct fit;
- a flat foundation;
- proper lace placement;
- balanced density;
- thoughtful styling.
The women who become most confident with wigs are usually not the ones who never make mistakes.
They are the ones who learn how to adjust.
A wig is a styling tool.
It should give you freedom.
Not stress.
So the next time you notice a little cap showing, do not immediately blame the wig.
Look at the whole picture.
The solution is often closer than you think.
