
How to Install a Lace Front Wig Step by Step: A Beginner-Friendly Guide for a Natural Hairline
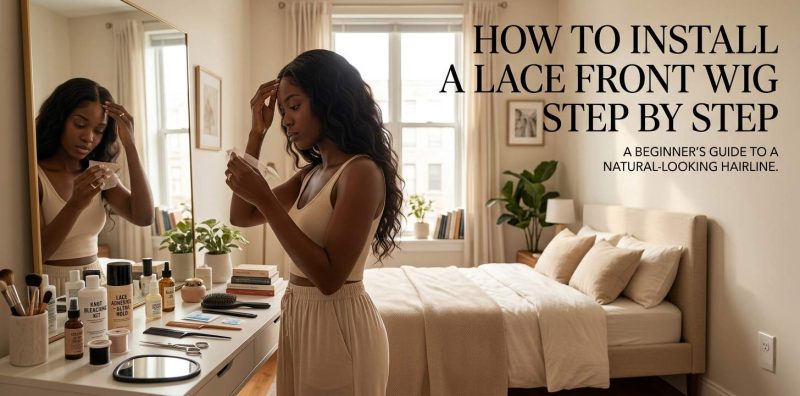
Why Does Your Lace Front Wig Look Perfect in Your Hands but Suddenly Look Like a Wig on Your Head?
You’ve probably had that moment.
The wig arrives.
You take it out of the package.
The hair looks beautiful. The part looks promising. The lace feels delicate and almost invisible.
You put it on.
And somehow…
it doesn’t look like the picture.
The hairline seems too straight.
The lace looks lighter than your skin.
The wig sits too far forward.
Or there’s that tiny strip of lace that catches the light every time you turn your head.
It can be frustrating because the problem isn’t necessarily the wig.
Often, it’s the installation.
Installing a lace front wig is less about “gluing hair down” and more about creating the illusion that the hair is growing from your scalp.
That requires several things to work together:
cap placement, foundation, lace preparation, hairline positioning, adhesive or glueless security, tension, and finishing.
Miss one of those steps and the result can look noticeably different.
The good news?
You don’t need to be a professional stylist to learn the fundamentals.
You just need to slow the process down.
What You Need Before Installing a Lace Front Wig
Before touching the lace, put everything within reach.
There is nothing worse than getting halfway through an installation and realizing your scissors are across the room.
For a basic adhesive installation, gather:
- Lace front wig
- Wig cap
- Rat-tail comb
- Wide-tooth comb
- Hair clips
- Small scissors or lace-cutting scissors
- Alcohol wipes or a suitable scalp cleanser
- Adhesive suitable for wig installation
- Adhesive remover
- Edge brush
- Blow dryer with a cool or low-warm setting
- Satin scarf or elastic band for setting the lace
- Optional lace tint
- Optional edge control
For a glueless installation, you may not need adhesive at all. Depending on the construction, an adjustable band, combs, clips, or a secure cap design may provide the hold you need.
If you are choosing a wig specifically because you want less adhesive and fewer installation steps, the glueless wig collection is a useful category to explore.

glueless wigs

glueless wigs
High Quality Straight Glueless Human Hair Wigs Natural Hairline Lace Front Wigs Human Hair
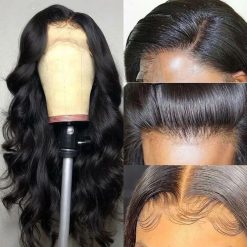
glueless wigs
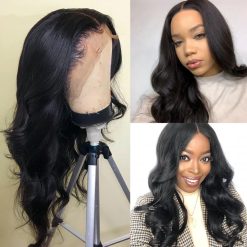

13x6 Lace Front Human Hair Wig
Step 1: Prepare Your Natural Hair
The wig will only look as flat as the foundation underneath it.
This is where beginners sometimes rush.
They put the wig cap on immediately, tuck their hair underneath, and wonder why the finished style has a bump near the crown.
Your natural hair doesn’t need to disappear.
It needs to be distributed evenly.
For Long or Thick Hair
Create two or more flat cornrows going backward.
The goal isn’t to braid extremely tightly.
Actually, tight braids can create unnecessary tension on your scalp and make the wig uncomfortable.
Instead, create a smooth, relatively flat base.
For very long hair, you can divide it into several braids and arrange them around the head rather than creating one large mound at the back.
For Short Hair
If your natural hair is short enough, brush it backward and secure it as flat as comfortably possible.
Avoid creating a large ponytail at the back.
That single lump can change how the wig sits.
The Rule to Remember
Flat doesn’t mean tight.
Your goal is a smooth foundation, not a headache.
Step 2: Put on the Wig Cap Without Creating a Visible Bump
Place the wig cap over your natural hair.
Pull it evenly around the head.
Check the crown.
Check behind the ears.
Check the nape.
If you see a thick ridge anywhere, fix it now.
Don’t assume the wig will hide it.
The lace may conceal the transition at the front, but it cannot magically flatten a large bump underneath.
For a more natural result, choose a cap color that doesn’t create a distracting contrast beneath the lace.
This becomes particularly important with an HD lace wig, because the thinner lace can reveal more of the underlying foundation.

Step 3: Clean the Hairline Before Applying Adhesive
This is one of the most important steps.
Adhesive doesn’t bond well to a layer of oil, sweat, moisturizer, or makeup.
Think about putting a sticker on a freshly cleaned window versus one covered in lotion.
The same basic principle applies.
Gently clean the skin along the hairline using an appropriate cleanser or alcohol wipe, depending on your skin tolerance and the adhesive system you’re using.
Let the area dry completely.
Don’t immediately apply adhesive while the skin is still damp.
And don’t aggressively scrub the hairline.
The goal is clean and dry—not irritated.
What About Sensitive Skin?
If you know you react to certain adhesives, don’t experiment with a full installation immediately.
Patch-test products according to their instructions.
If irritation, burning, swelling, or persistent redness occurs, remove the product and stop using it.
A beautiful installation is never worth damaging your skin.
Step 4: Try the Wig on Before Cutting Anything
This is the step I wish more beginners would take seriously.
Do not cut the lace first.
Put the wig on.
Adjust the straps.
Position the ear tabs.
Look straight ahead.
Turn your head left.
Turn right.
Look down.
Now check the hairline.
Where does the lace naturally sit?
Where does your natural hairline begin?
Does the center part line up?
Does the wig sit too far forward?
Does the ear tab extend too far?
You want to answer these questions before making permanent changes.
Why This Matters for 13×4 vs. 13×6
A 13×4 lace front wig generally provides a lace area extending across the front with a moderate amount of parting space.
A 13×6 lace front wig provides a deeper lace area, giving you more room for parting and styling.
But neither construction automatically looks natural.
The wig still needs to be positioned according to your own head shape and desired hairline.
Step 5: Decide Where Your New Hairline Should Sit
This is where installation becomes more artistic.
Your lace should not automatically sit exactly where your natural hairline sits.
For many people, placing the wig slightly behind the very front edge of the natural hairline creates a more believable transition.
But there is no universal measurement that works for every face.
Look at your natural proportions.
A very straight, perfectly symmetrical wig hairline can look less natural than a slightly irregular one.
Real hairlines aren’t ruler-straight.
They have small variations in density and direction.
Don’t Overdo the Baby Hairs
This deserves its own warning.
Baby hairs can soften a transition.
Too many baby hairs can make an installation look intentionally styled rather than naturally grown.
You don’t need a row of tiny curls across your entire forehead.
Sometimes three or four carefully placed sections look more believable than twenty.
Step 6: Trim the Lace Carefully
Now you can begin cutting.
But don’t rush.
If the wig comes with excess lace, leave a small margin rather than cutting directly against the hairline in one aggressive pass.
Use small scissors.
Work slowly.
Follow the natural shape of the hairline.
Avoid creating one perfectly straight line.
The “Small Snips” Method
Instead of:
snip—snip—one straight line
try:
small snip—small snip—slight angle—pause—check—continue.
Tiny irregularities help the lace disappear more naturally.
But be careful not to cut into the ventilated hair.
Once you’ve removed too much lace, there isn’t an easy way to put it back.
Step 7: Decide Between Adhesive and Glueless Installation
Not every lace front wig needs glue.
That decision depends on the wig construction, your lifestyle, how long you want to wear it, and how secure you need the installation to be.
When a Glueless Installation Makes Sense
A glueless wig can be especially convenient if you:
- remove your wig frequently
- don’t want adhesive on your skin
- prefer a simpler routine
- want less cleanup
- have a properly fitted cap
Adjustable straps and internal combs or clips can help secure the wig.
But remember:
A glueless wig should fit your head.
If it is too large, tightening the straps excessively may create discomfort rather than genuine security.
When Adhesive May Be Useful
Adhesive can provide additional security for longer wear or situations where you want the lace to stay closely against the skin.
But more adhesive does not automatically mean a better installation.
Too much adhesive can create:
- visible residue
- difficulty removing the wig
- buildup around the hairline
- harder cleanup
- additional stress during removal
The goal is a controlled bond, not a thick layer.


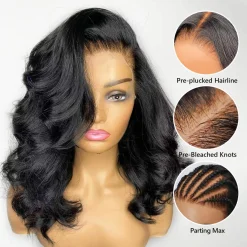
HD lace wigs
Pre-bleached Knots Straight HD Lace Frontal Wig 180% Density 6×5 Pre-cut Lace Wear & Go Glueless Wig

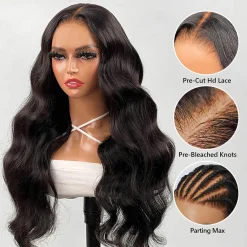
HD lace wigs

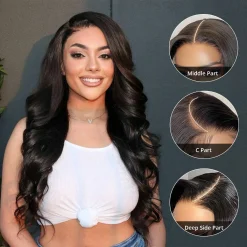


HD lace wigs
Glueless Straight Short Bob Wigs Brazilian Clear Lace 180% Density Hd Closure Wig Human Hair

HD lace wigs


Step 8: Apply Adhesive in Thin, Controlled Layers
If you’re using adhesive, resist the temptation to apply a thick line.
A thin layer is easier to control.
Apply it only where the lace needs to bond.
Allow each layer to become tacky according to the adhesive manufacturer’s instructions before adding another layer.
This timing matters.
If adhesive is still wet when the lace is pressed into it, the result can become messy.
If it has dried too much, the lace may not bond evenly.
Why Adhesive Timing Matters
Think of adhesive as a controlled transition.
Wet adhesive can move.
Tacky adhesive can grip.
Fully dried adhesive may no longer provide the intended bond.
Your specific adhesive determines the exact waiting time, so follow its directions rather than relying on a universal number.
This is one area where “more” and “longer” aren’t automatically better.
Step 9: Press the Lace Into Place—Don’t Drag It
Once the adhesive reaches the appropriate tackiness, position the lace.
Start at the center.
Then work toward one side.
Then the other.
Gently press.
Don’t slide the lace back and forth.
Dragging can move the adhesive and create an uneven bond.
Use the back of a rat-tail comb or a clean edge tool to press the lace down carefully.
The Hairline Should Follow Your Head
Watch the contour.
The lace should sit naturally against the forehead.
If one section is floating while another is firmly attached, don’t immediately add more adhesive.
Check whether the wig itself is positioned correctly.
Sometimes the problem isn’t insufficient adhesive.
It’s incorrect placement.
Step 10: Let the Lace Set
This is the moment when patience pays off.
After pressing the lace into position, cover the hairline with a melt band or satin scarf.
Keep the pressure even.
A cool or low-warm blow dryer can help according to the adhesive product’s directions.
Don’t blast the hairline with very high heat.
You’re setting lace and adhesive—not baking a cake.
Allow the installation to settle before immediately styling the hair.
Step 11: Remove the Melt Band and Inspect the Hairline
Now take a look in natural light.
Not just your bathroom mirror.
Natural daylight can reveal details that warm indoor lighting hides.
Check:
- Does the lace blend?
- Is the hairline too straight?
- Is there visible adhesive?
- Are there white patches?
- Is the lace lifting?
- Is the wig sitting too far forward?
- Are the baby hairs excessive?
- Does the density match your desired look?
If something looks wrong, don’t keep adding product.
Diagnose first.
Step 12: Customize the Hairline Without Making It Look Overdone
This is where a good installation can become a great one—or go completely sideways.
The temptation is to customize everything.
Bleach every knot.
Cut dramatic baby hairs.
Thin the entire front.
Pluck until the hairline becomes extremely sparse.
You don’t need to do all of that.
Knot Bleaching: Less Is Usually Safer
Bleaching knots changes the color of the dark knot where the hair is ventilated into the lace.
The goal is subtle reduction of visibility.
Overprocessing can weaken the hair around the knot and contribute to shedding.
If you’re bleaching knots, follow the bleach manufacturer’s mixing ratio and processing instructions rather than using a random developer concentration or leaving the mixture on until the knots look completely invisible.
A beginner’s mistake is chasing a perfectly invisible knot at the expense of the hair itself.
A slightly visible knot is often easier to live with than a damaged hairline.
Step 13: Style the Hair After the Lace Is Secure
Now comes the fun part.
If you’re wearing a body wave wig, refresh the waves gently.
If you’re wearing a curly wig, use your fingers or an appropriate wide-tooth tool rather than aggressively brushing through the curl pattern.
If you’re wearing a straight wig, keep the styling simple and avoid unnecessary passes with a flat iron.
The installation should support the hairstyle—not fight against it.

Step 14: Check the Installation in Different Lighting
This is one of the easiest professional habits to copy at home.
Check the wig in:
Bathroom light.
Window light.
Outdoor shade.
Phone camera.
Why?
Because different lighting reveals different problems.
A lace that looks invisible under warm yellow light may suddenly appear slightly gray or shiny beside a window.
A perfectly flat hairline from the front may look too dense from the side.
A hairstyle that looks balanced in the mirror may reveal too much bulk in a phone photograph.
You don’t need to obsess over every angle.
You just need to know what the installation actually looks like outside your bathroom.
If your lace consistently looks obvious outdoors, the problem may be color matching, density, placement, or adhesive residue rather than the lace itself.
The Four Most Common Lace Front Installation Problems
Problem 1: The Lace Looks White
Possible causes include:
- adhesive residue
- wrong lace tint
- product buildup
- dry adhesive
- incompatible products
- excessive powder or foundation
Don’t immediately apply another thick layer of makeup.
First identify why the lace looks white.
Problem 2: The Lace Is Lifting
Possible causes include:
- oily skin
- sweat
- incorrect adhesive timing
- too little preparation
- excessive moisture
- incorrect wig placement
- cap tension
If only one small section lifts, don’t automatically cover the entire hairline with more adhesive.
Clean and reassess the affected area.
For a deeper look at this exact issue, you can read the related guide on why a lace front wig keeps lifting.
Problem 3: The Hairline Looks Too Thick
This is usually a density or placement issue.
Real hairlines often become gradually denser as you move backward.
If every strand begins at exactly the same density along a straight line, the wig can look artificial.
Small adjustments to density and styling can create a softer transition.
Problem 4: The Wig Looks Like It’s Sitting on Top of Your Head
This often comes down to the foundation.
Check:
- Is your natural hair flat enough?
- Is the wig cap creating a ridge?
- Is the wig too large?
- Is the lace positioned too far forward?
- Is the hairline too dense?
- Is there excessive product at the roots?
Don’t try to solve every problem with more adhesive.
Sometimes the foundation needs to be corrected first.
13×4 vs. 13×6 Lace Front Wig: Which Is Easier to Install?
Both can create natural-looking results.
The difference is mainly the amount of lace and styling space available.
A 13×4 lace front wig gives you a front lace area with moderate parting depth.
A 13×6 lace front wig generally gives you a deeper lace area, which can provide more room for middle parts, side parts, and styling versatility.
For beginners, the most important factor isn’t simply choosing the larger number.
It’s choosing a construction that matches how you actually want to part and style the hair.
A deeper lace area doesn’t automatically make installation easier.
It simply gives you more area to work with.
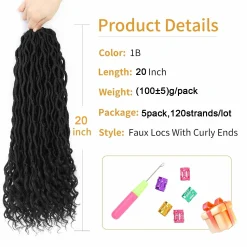
Synthetic Extensions


Synthetic Extensions

Synthetic Extensions
Synthetic Extensions


Adhesive vs. Glueless: Which Installation Method Is Better?
There isn’t one universal winner.
It depends on what you want from the wig.
| Feature | Adhesive Installation | Glueless Installation |
| Security | Can provide strong hold | Depends heavily on cap fit |
| Removal | Requires careful adhesive removal | Usually simpler |
| Daily convenience | More preparation | Usually faster |
| Skin contact | Adhesive touches skin | Less adhesive-related contact |
| Maintenance | More cleanup | Generally simpler |
| Best for | Longer or more secure wear | Frequent removal and convenience |
A well-fitted glueless wig can be incredibly practical.
An adhesive installation can also work beautifully when applied carefully.
The mistake is assuming that one method has to be right for everyone.
A Beginner’s 20-Minute Installation Checklist
Once you’ve practiced several times, your routine may become much faster.
Before Installation
5 minutes
- Prepare natural hair.
- Put on wig cap.
- Clean hairline.
- Prepare tools.
Positioning
5 minutes
- Put wig on.
- Adjust straps.
- Align ear tabs.
- Check center and side parts.
- Mark where lace should sit.
Lace and Adhesive
5 minutes
- Trim excess lace.
- Apply adhesive if needed.
- Wait for correct tackiness.
- Press lace into place.
Finishing
5 minutes
- Set with melt band.
- Inspect hairline.
- Style hair.
- Check natural light.
The first few times may take considerably longer.
That’s normal.
Don’t race through the installation simply because a tutorial says it takes twenty minutes.
Skill comes from repetition.
How to Make Your Lace Front Wig Look More Natural
If your goal is a natural result, focus on four things.
1. Correct Placement
The wig should sit where it makes sense for your facial proportions.
2. Appropriate Density
Too much density at the front can make even excellent lace look artificial.
3. Natural Hairline Irregularity
Real hairlines aren’t perfectly straight.
4. Clean Lace
Visible adhesive, powder, tint, or residue can make a beautiful wig look less natural.
These four factors matter more than creating elaborate baby hairs.
How to Remove a Lace Front Wig Without Damaging Your Hairline
Installation is only half the process.
Removal deserves just as much care.
If adhesive was used, apply an appropriate remover according to the product’s directions.
Allow it time to work.
Then gently separate the lace.
Never yank.
Never pull from one tiny corner with force.
Once the wig is removed, clean remaining adhesive from the skin using an appropriate method.
Then clean and store the wig according to its material and construction.
If you’re repeatedly wearing the same lace front wig, gentle removal can make a meaningful difference to both the lace and the hairline.
The Girlfriend Rule: Your Best Installation Is the One You Can Repeat
If we were getting ready together before dinner, I wouldn’t tell you that the perfect lace front installation requires a dozen complicated tricks.
I’d probably say:
Slow down.
Clean the skin.
Make the foundation flat.
Try the wig on before cutting.
Don’t rush the lace.
Don’t drown the hairline in adhesive.
And please—don’t keep cutting once the lace already looks natural.
That’s the part people often miss.
A natural installation isn’t necessarily the most heavily customized one.
Sometimes the most convincing hairline is the one where you stopped before going too far.
Your lace front wig doesn’t need to look like it has been glued onto your forehead.
It should simply look like the hair belongs there.
And once you understand that, installing a lace front wig becomes much less intimidating.
HD lace wigs
Pre-bleached Knots Straight HD Lace Frontal Wig 180% Density 6×5 Pre-cut Lace Wear & Go Glueless Wig
HD lace wigs
HD lace wigs
Glueless Straight Short Bob Wigs Brazilian Clear Lace 180% Density Hd Closure Wig Human Hair
HD lace wigs
FAQ: How to Install a Lace Front Wig
Do I need glue to install a lace front wig?
No.
Many lace front wigs can be installed without adhesive if the cap fits properly and has suitable straps, combs, clips, or another securing method.
Should I cut the lace before trying the wig on?
It is usually better to try the wig on first.
This lets you check the hairline position, ear tabs, cap fit, and parting before making permanent cuts.
How much lace should I leave when cutting?
There is no single measurement that works for every wig.
Leave enough material to create a clean transition without cutting into the ventilated hair.
Small, controlled cuts are safer than one large straight cut.
Should I bleach the knots?
Not necessarily.
Bleaching can reduce the visibility of darker knots, but excessive processing can weaken the hair around the knots.
A natural-looking result does not require aggressively bleached knots.
How long should lace adhesive dry?
Follow the adhesive manufacturer’s instructions.
The correct timing depends on the specific product.
Generally, you’re looking for the appropriate tackiness rather than applying the lace while the adhesive is completely wet.
Why is my lace lifting after installation?
Common causes include skin oils, sweat, moisture, insufficient preparation, incorrect adhesive timing, cap fit, or tension.
Identify the cause before simply adding more adhesive.
Can I install an HD lace wig the same way?
The general process is similar.
However, HD lace is thinner and deserves particularly gentle handling during trimming, bonding, removal, and customization.
Why does my wig look too thick at the hairline?
The density may be too high, the wig may be positioned incorrectly, or the hairline may not have been customized appropriately.
Avoid removing too much hair at once.
How do I make baby hairs look natural?
Use a small amount of hair.
Real baby hairs are not usually a dramatic row of perfectly curled strands.
Keep the pattern irregular and subtle.
Can I wear a lace front wig every day?
Yes, but daily wear requires more attention to scalp comfort, installation, removal, cleansing, and wig maintenance.
Giving your scalp breaks when practical can also make your routine more comfortable.
Is a 13×6 better than a 13×4 lace front wig?
Not necessarily.
A 13×6 provides more lace and deeper parting space, while a 13×4 can be perfectly suitable for many everyday hairstyles.
Choose based on how you actually want to part and style the wig.
How do I keep my lace front wig from looking fake?
Focus on placement, density, lace blending, hairline customization, clean adhesive, and realistic styling.
Natural-looking results usually come from several small details working together rather than one special trick.

Final Thought: Installation Is a Skill, Not a Race
The first lace front wig installation can feel strangely personal.
You’re standing in front of a mirror with scissors in one hand, lace in the other, and a tiny voice asking:
What if I mess this up?
We’ve all been there.
The answer isn’t to rush.
It’s to understand what you’re doing.
A lace front wig looks natural when the foundation is flat, the lace is positioned correctly, the hairline makes sense, and the installation doesn’t fight against your own features.
So take your time.
Try the wig on before cutting.
Use less adhesive rather than more when possible.
Treat the lace gently.
And remember that a slightly imperfect hairline can actually look more believable than one that has been customized until every strand is identical.
Once you’ve installed a few wigs, the process becomes familiar.
You start noticing the little things.
The angle of the ear tab.
The position of the part.
The density around the temples.
The way light hits the lace.
The way the hairline changes when you smile.
That’s when installing a lace front wig stops feeling like a technical project and starts becoming part of getting ready.
And honestly, that’s where the fun begins.
Synthetic Extensions
Synthetic Extensions
Synthetic Extensions
Synthetic Extensions
